
pip install pyhanlp
Collecting pyhanlp
  Downloading pyhanlp-0.1.84.tar.gz (136 kB)
     |████████████████████████████████| 136 kB 200 kB/s
    ERROR: Command errored out with exit status 1:
     command: /usr/bin/python3 -c 'import sys, setuptools, tokenize; sys.argv[0] = '"'"'/tmp/pip-install-_nqrglf6/pyhanlp_cf6008a0290040a6a2568259ab451186/setup.py'"'"'; __file__='"'"'/tmp/pip-install-_nqrglf6/pyhanlp_cf6008a0290040a6a2568259ab451186/setup.py'"'"';f=getattr(tokenize, '"'"'open'"'"', open)(__file__);code=f.read().replace('"'"'\r\n'"'"', '"'"'\n'"'"');f.close();exec(compile(code, __file__, '"'"'exec'"'"'))' egg_info --egg-base /tmp/pip-pip-egg-info-jpxm0hpx
         cwd: /tmp/pip-install-_nqrglf6/pyhanlp_cf6008a0290040a6a2568259ab451186/
    Complete output (10 lines):

    ----------------------------------------

    抱歉,暂不支持 Python 3.9 及以上版本。请执行如下命令:

    	conda install -c conda-forge python=3.8 openjdk jpype1=0.7.0 -y
    	pip install pyhanlp

    详细安装教程:https://bbs.hankcs.com/t/topic/13#install-1

    ----------------------------------------
WARNING: Discarding https://files.pythonhosted.org/packages/d2/fa/19ca69e0b94bbd9fed93272e5952d2308c13688647fac779a52729fa801f/pyhanlp-0.1.84.tar.gz#sha256=1047b2b6515c9844648c48f45b1f1cdb9a413067bea55587717a52c2944ad616 (from https://pypi.org/simple/pyhanlp/). Command errored out with exit status 1: python setup.py egg_info Check the logs for full command output.
  Downloading pyhanlp-0.1.83.tar.gz (136 kB)
     |████████████████████████████████| 136 kB 310 kB/s
    ERROR: Command errored out with exit status 1:
     command: /usr/bin/python3 -c 'import sys, setuptools, tokenize; sys.argv[0] = '"'"'/tmp/pip-install-_nqrglf6/pyhanlp_5141183371dd4bffb4697ef2460363eb/setup.py'"'"'; __file__='"'"'/tmp/pip-install-_nqrglf6/pyhanlp_5141183371dd4bffb4697ef2460363eb/setup.py'"'"';f=getattr(tokenize, '"'"'open'"'"', open)(__file__);code=f.read().replace('"'"'\r\n'"'"', '"'"'\n'"'"');f.close();exec(compile(code, __file__, '"'"'exec'"'"'))' egg_info --egg-base /tmp/pip-pip-egg-info-93bsbt9o
         cwd: /tmp/pip-install-_nqrglf6/pyhanlp_5141183371dd4bffb4697ef2460363eb/
    Complete output (10 lines):

    ----------------------------------------

    抱歉,暂不支持 Python 3.9 及以上版本。请执行如下命令:

    	conda install -c conda-forge python=3.8 openjdk jpype1=0.7.0 -y
    	pip install pyhanlp

    详细安装教程:https://bbs.hankcs.com/t/topic/13#install-1

    ----------------------------------------
WARNING: Discarding https://files.pythonhosted.org/packages/72/ec/d9097f82046739ee8a2aa227c5d56203bffefaf8e460d9d5411c751c0738/pyhanlp-0.1.83.tar.gz#sha256=2651a8875aa9b92353a59017cc0368f3bdbd6dada8b100504ab80917fb5db410 (from https://pypi.org/simple/pyhanlp/). Command errored out with exit status 1: python setup.py egg_info Check the logs for full command output.
ERROR: Could not find a version that satisfies the requirement pyhanlp
ERROR: No matching distribution found for pyhanlp
随着对本书的学习,你将从普通程序员晋级为机器学习工程师,最后进化到自然语言处理工程师。
https://bbs.hankcs.com/t/topic/13#install-1
这BGM 太闹了。看了一会儿,又是 WINDOWS 环境下的安装!跳过,老老实实按照提示切换回3.8吧。
conda install -c conda-forge python=3.8 openjdk jpype1=0.7.0 -y
conda:未找到命令
pip install conda
Collecting conda
  Downloading conda-4.3.16.tar.gz (299 kB)
     |████████████████████████████████| 299 kB 44 kB/s
Collecting pycosat>=0.6.1
  Downloading pycosat-0.6.3.zip (66 kB)
     |████████████████████████████████| 66 kB 42 kB/s
Requirement already satisfied: requests>=2.12.4 in /usr/lib/python3/dist-packages (from conda) (2.25.1)
Collecting ruamel.yaml>=0.11.14
  Downloading ruamel.yaml-0.17.21-py3-none-any.whl (109 kB)
     |████████████████████████████████| 109 kB 28 kB/s
Collecting ruamel.yaml.clib>=0.2.6
  Downloading ruamel.yaml.clib-0.2.6.tar.gz (180 kB)
     |████████████████████████████████| 180 kB 38 kB/s
Building wheels for collected packages: conda, pycosat, ruamel.yaml.clib
  Building wheel for conda (setup.py) ... done
  Created wheel for conda: filename=conda-4.3.16-py3-none-any.whl size=336938 sha256=edade8ed8b7b7fc7b0705442e92d86d6fd06ae589c43a65c6299e1d9602f674a
  Stored in directory: /home/pi/.cache/pip/wheels/2a/96/b0/3260315d5b6f74397510d6b3eb6ccde93623a6bdd9e180ee61
  Building wheel for pycosat (setup.py) ... done
  Created wheel for pycosat: filename=pycosat-0.6.3-cp39-cp39-linux_aarch64.whl size=168362 sha256=7e43de9a66ed34fefd2e8d763e8243f1ac5b89141d4ffedce44dddb8e3b41b67
  Stored in directory: /home/pi/.cache/pip/wheels/8c/c4/34/9ccbaac74c64deb727e916d00905158b6941b006bc829fa7fe
  Building wheel for ruamel.yaml.clib (setup.py) ... done
  Created wheel for ruamel.yaml.clib: filename=ruamel.yaml.clib-0.2.6-cp39-cp39-linux_aarch64.whl size=622791 sha256=255cccd70d6cde1f1103a11b02a141c5fb8c255b1bd195a1dd2c695719a10a75
  Stored in directory: /home/pi/.cache/pip/wheels/b1/c4/5d/d96e5c09189f4d6d2a9ffb0d7af04ee06d11a20f613f5f3496
Successfully built conda pycosat ruamel.yaml.clib
Installing collected packages: ruamel.yaml.clib, ruamel.yaml, pycosat, conda
  WARNING: The script conda is installed in '/home/pi/.local/bin' which is not on PATH.
  Consider adding this directory to PATH or, if you prefer to suppress this warning, use --no-warn-script-location.
Successfully installed conda-4.3.16 pycosat-0.6.3 ruamel.yaml-0.17.21 ruamel.yaml.clib-0.2.6
conda install -c conda-forge python=3.8 openjdk jpype1=0.7.0 -y
conda:未找到命令
为啥还找不到命令呢?
bing 如何切换 PYTHON 到老版本 LINUX
Linux下切换Python版本的3种方法
在Linux下有时候需要使用多个不同版本的Python,然而在终端输入命令python时,不一定是所需要的版本。以下总结几种切换Python版本的方法。
方法1:打开具体的某个Python文件,在第一行处修改如下:将#!/usr/bin/python修改为#!/usr/bin/python2表示采用Python2来对该文件进行编译,改为python3亦然。
方法2:采用软链接的方式,指令如下:
    $ whereis python
    $ rm /usr/bin/python
    $ ln -s /usr/bin/python3.6 /usr/bin/python
这个就将Python默认为3.6版本了。
方法3:采用指令update-alternatives切换,输入如下指令进行选择:
$ sudo update-alternatives --config python
选择想要的Python即可。sudo update-alternatives --config python
update-alternatives: 错误: 无 python 的候选项

python
Python 2.7.18 (default, Mar  9 2021, 11:09:26)
[GCC 10.2.1 20210306] on linux2
Type "help", "copyright", "credits" or "license" for more information.
python3
Python 3.9.5 (default, Nov 18 2021, 16:00:48)
[GCC 10.3.0] on linux
Type "help", "copyright", "credits" or "license" for more information.
>>>
ls /usr/bin/py*
/usr/bin/py3clean     /usr/bin/pygettext2.7  /usr/bin/python3
/usr/bin/py3compile   /usr/bin/pygettext3    /usr/bin/python3.9
/usr/bin/py3versions  /usr/bin/pygettext3.9  /usr/bin/python3.9-config
/usr/bin/pydoc2       /usr/bin/pygmentize    /usr/bin/python3-config
/usr/bin/pydoc2.7     /usr/bin/pyjwt3        /usr/bin/python3-futurize
/usr/bin/pydoc3       /usr/bin/python        /usr/bin/python3-pasteurize
/usr/bin/pydoc3.9     /usr/bin/python2       /usr/bin/pyversions
/usr/bin/pygettext2   /usr/bin/python2.7
翻出来了一个较早的LINUX系统,查看了下:
python3
Python 3.7.3 (default, Jan 22 2021, 20:04:44)
[GCC 8.3.0] on linux
Type "help", "copyright", "credits" or "license" for more information.
切换系统,重启,找不到论坛了,然后输入 BBS.HANLP.COM
居然有一个镜像站,没有我的帖子,看来是新社区,暂时先写到这里吧.上手是第一要务.
pip install pyhanlp
Looking in indexes: https://pypi.org/simple, https://www.piwheels.org/simple
Collecting pyhanlp
  Downloading https://files.pythonhosted.org/packages/d2/fa/19ca69e0b94bbd9fed93272e5952d2308c13688647fac779a52729fa801f/pyhanlp-0.1.84.tar.gz (136kB)
    100% |████████████████████████████████| 143kB 98kB/s
Collecting hanlp-downloader (from pyhanlp)
  Downloading https://files.pythonhosted.org/packages/b4/4d/fef63be131c99e7f42f866175cc47be834ae0b5afe6f3e38a5b3d090fc2b/hanlp_downloader-0.0.25.tar.gz
Collecting jpype1==0.7.0 (from pyhanlp)
  Downloading https://files.pythonhosted.org/packages/28/63/784834e8a24ec2e1ad7f703c3dc6c6fb372a77cc68a2fdff916e18a4449e/JPype1-0.7.0.tar.gz (470kB)
    100% |████████████████████████████████| 471kB 108kB/s
Requirement already satisfied: requests in /usr/lib/python2.7/dist-packages (from hanlp-downloader->pyhanlp) (2.21.0)
Building wheels for collected packages: pyhanlp, hanlp-downloader, jpype1
  Running setup.py bdist_wheel for pyhanlp ... done
  Stored in directory: /home/pi/.cache/pip/wheels/bb/55/b9/2611ed7cbbdd4708175d552b473745c9552f6efe1768ac3181
  Running setup.py bdist_wheel for hanlp-downloader ... done
  Stored in directory: /home/pi/.cache/pip/wheels/2f/48/9a/50c931b32232717e3b4a57b88e5bd8507f6151e4cba9fd2b35
  Running setup.py bdist_wheel for jpype1 ... done
  Stored in directory: /home/pi/.cache/pip/wheels/68/68/4f/c5f2d175cb26a2765561069a80c4285488d17be01eecb21597
Successfully built pyhanlp hanlp-downloader jpype1
Installing collected packages: hanlp-downloader, jpype1, pyhanlp
  The script hanlp is installed in '/home/pi/.local/bin' which is not on PATH.
  Consider adding this directory to PATH or, if you prefer to suppress this warning, use --no-warn-script-location.
Successfully installed hanlp-downloader-0.0.25 jpype1-0.7.0 pyhanlp-0.1.84
幸好提示过,第一次安装需要些时间.成功了看样子.吃饭.回来再玩.
我用树莓派搞定HANLP,就太欢喜了.
pyhanlp官方文档:https://pypi.org/project/pyhanlp/
中文分词
使用命令hanlp segment进入交互分词模式,输入一个句子并回车,HanLP1.x会输出分词结果:
# hanlp segment
Traceback (most recent call last):
  File "/home/pi/.local/bin/hanlp", line 6, in <module>
    from pyhanlp.main import main
  File "/home/pi/.local/lib/python2.7/site-packages/pyhanlp/__init__.py", line 149, in <module>
    _start_jvm_for_hanlp()
  File "/home/pi/.local/lib/python2.7/site-packages/pyhanlp/__init__.py", line 41, in _start_jvm_for_hanlp
    from pyhanlp.static import STATIC_ROOT, hanlp_installed_data_version, HANLP_DATA_PATH
  File "/home/pi/.local/lib/python2.7/site-packages/pyhanlp/static/__init__.py", line 13, in <module>
    from hanlp_downloader import Downloader
  File "/home/pi/.local/lib/python2.7/site-packages/hanlp_downloader/__init__.py", line 4, in <module>
    from .down import Downloader
  File "/home/pi/.local/lib/python2.7/site-packages/hanlp_downloader/down.py", line 37
    def __init__(self, url, file_name, chunk_count, high_speed=False, headers: Dict[str, str] = None):
                                                                             ^
SyntaxError: invalid syntax
linux下切换python2和python3(转)
0x00 为什么需要有两个版本的Python
Python2和Python3不兼容是每个接触过Python的开发者都知道的事,虽说Python3是未来,但是仍然有很多项目采用Python2开发。Linux的许多发行版本(如Ubuntu)都会自带Python2.7,但是当我们准备开发一个Python3项目的时候,我们该怎么办?
那就把Python3也下咯。嗯,Linux下确实是可以两个一起装的,但是问题是你怎么切换两个版本的Python。
0x01 修改别名
首先先来看一下我们的默认Python版本
$ python --version
Python 2.7.6
然后我们修改一下别名
$ alias python='/usr/bin/python3'
$ python --version
Python 3.4.3  # 版本已经改变
/usr/bin/python3 这个路径是怎么找到的呢?
一般来说,软件的二进制文件都可以在 /usr/bin 或 /usr/local/bin (这个优先级高一点)找到。当然如果你是Debian系的Linux,可以这么找(前提是你已经安装了Python3):
$ dpkg -L python3
上面的别名修改只是暂时性的,重开一个窗口后配置就不见了。如果要使每个窗口都使用这个别名,可以编辑 ~/.bashrc (如果你是别的shell的话,就不是这个文件,如zsh是 ~/.zshrc ),把alias配置写入文件。
修改别名优点是足够简单,但是切换不灵活。
0x02 链接文件
在 /usr/bin 中建立一个链接文件指向Python3。
$ ln -s python /usr/bin/python3
$ python --version
Python 3.4.3
跟修改别名一样,也是修改不够灵活。
0x03 采用update-alternatives 切换版本
update-alternatives是Debian提供的一个工具(非Debian系的就不用看了),原理类似于上面一个办法,也是通过链接的方式,但是其切换的过程非常方便。
首先看一下update-alternatives的帮助信息:
$ update-alternatives --help
用法:update-alternatives [<选项> ...] <命令>

命令:
  --install <链接> <名称> <路径> <优先级>
    [--slave <链接> <名称> <路径>] ...
                           在系统中加入一组候选项。
  --remove <名称> <路径>   从 <名称> 替换组中去除 <路径> 项。
  --remove-all <名称>      从替换系统中删除 <名称> 替换组。
  --auto <名称>            将 <名称> 的主链接切换到自动模式。
  --display <名称>         显示关于 <名称> 替换组的信息。
  --query <名称>           机器可读版的 --display <名称>.
  --list <名称>            列出 <名称> 替换组中所有的可用候选项。
  --get-selections         列出主要候选项名称以及它们的状态。
  --set-selections         从标准输入中读入候选项的状态。
  --config <名称>          列出 <名称> 替换组中的可选项,并就使用其中
                           哪一个,征询用户的意见。
  --set <名称> <路径>      将 <路径> 设置为 <名称> 的候选项。
  --all                    对所有可选项一一调用 --config 命令。

<链接> 是指向 /etc/alternatives/<名称> 的符号链接。
    (如 /usr/bin/pager)
<名称> 是该链接替换组的主控名。
    (如 pager)
<路径> 是候选项目标文件的位置。
    (如 /usr/bin/less)
<优先级> 是一个整数,在自动模式下,这个数字越高的选项,其优先级也就越高。

选项:
  --altdir <目录>          改变候选项目录。
  --admindir <目录>        设置 statoverride 文件的目录。
  --log <文件>             改变日志文件。
  --force                  就算没有通过自检,也强制执行操作。
  --skip-auto              在自动模式中跳过设置正确候选项的提示
                           (只与 --config 有关)
  --verbose                启用详细输出。
  --quiet                  安静模式,输出尽可能少的信息。不显示输出信息。
  --help                   显示本帮助信息。
  --version                显示版本信息。
我们仅需要了解3个参数就行了
-
--install <链接> <名称> <路径> <优先级>:建立一组候选项 -
--config <名称>:配置 <名称>组中的可选项,并选择使用其中哪一个 -
--remove <名称> <路径>:从 <名称> 中去掉 <路径>选项
首先我们先看一下有没有关于Python的可选项:
$ update-alternatives --display python
update-alternatives: 错误: 无 python 的候选项
那首先先建立python的组,并添加Python2和Python3的可选项
$ sudo update-alternatives --install /usr/bin/python python /usr/bin/python2.7 2 # 添加Python2可选项,优先级为2
$ sudo update-alternatives --install /usr/bin/python python /usr/bin/python3.4 1 #添加Python3可选项,优先级为1
注意,这里的 /usr/bin/python 链接文件,两个可选项必须是一样的,这样这个链接文件才可以选择两个不同的可选项去链接。
这时如果我们查看 /usr/bin/python 这个文件时,会发现它已经链接到了 /etc/alternatives/python 。
lrwxrwxrwx 1 root root 24 6月 19 18:39 python -> /etc/alternatives/python
然后我们再看一下版本
$ python --version
Python 2.7.6
为什么还是Python2,看一下配置
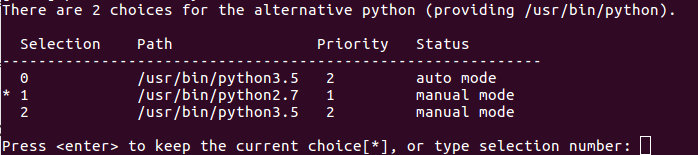
$ sudo update-alternatives --config python
有 2 个候选项可用于替换 python (提供 /usr/bin/python)。

  选择       路径              优先级  状态
------------------------------------------------------------
* 0            /usr/bin/python2.7   2         自动模式
  1            /usr/bin/python2.7   2         手动模式
  2            /usr/bin/python3.4   1         手动模式
要维持当前值[*]请按回车键,或者键入选择的编号:
原来是因为默认选中了自动模式,而Python2的优先级高于Python3,这时候只要键入2,就可以使用Python3了。
如果你想要删除某个可选项的话:
$ sudo update-alternatives --remove python /usr/bin/python2.7
update-alternatives只适用于Debian系Liunx。
0x04 virtualenvwrapper 切换版本
virtualenvwrapper是管理Python虚拟环境的工具,可以很方便的为不同的项目建立独立的环境,每个项目都可以安装自己的依赖,同时也支持在不同的虚拟环境中存在不同版本的Python。
首先安装virtualenvwrapper,可以选择apt安装或者pip安装
apt安装
$ sudo apt-get install virtualenvwrapper
pip安装
$ sudo pip install virtualenvwrapper
当你需要使用Python2开发项目时,建立一个Python2的虚拟环境:
$ mkvirtualenv -p /usr/bin/python2 env27
当你需要Python3开发时:
$ mkvirtualenv -p /usr/bin/python3.4 env34
然后可以随时切换不同的虚拟环境:
$ workon env27  # 进入Python2环境
$ workon env34  # 进入Python3环境
更爽的是,你可以在进入虚拟环境的同时切换到项目目录,只需要编辑 $VIRTUAL_ENV/bin/postactivate 这个文件即可:
$ vim $VIRTUAL_ENV/bin/postactivate #前提是已经进入对应的虚拟环境
在文件中添加切换目录的命令:
cd /path/to/your/project
0x05 总结
前面两种方法不推荐使用。
使用 update-alternatives 切换版本只适用于Debian系的Linux。
推荐使用 virtualenvwrapper 来管理虚拟环境和版本。
另外,本文介绍的切换不同版本软件的方法,除了 virtualenvwrapper 之外,前面3种方法都适用于其他软件,比如Java(open-jdk和oracle-jdk)。
转自:linux下切换python2和python3_故常无-欲以观其妙的博客-CSDN博客_linux切换python3
太喜欢这个粘帖功能了,直接把MARKDOWN格式粘过来了.没有之一,还有图床,也相当给力,不愧是做nlp的,编辑的福音啊. 
linux 删除软链接文件

千年的塔![]() 于 2012-10-27 00:40:31 发布
于 2012-10-27 00:40:31 发布![]() 4707
4707![]() 收藏
收藏
分类专栏: shell
 shell专栏收录该内容
42 篇文章0 订阅
订阅专栏
Linux 删除软链接文件
软链接即用 ln -s 原始文件或文件夹 目标文件或文件夹
当想删除链接文件时 如果不小新 会把原始文件删掉
例:
ln -s /home/user/bak /var/bak
rm /var/bak/ 会提示bak是一个文件夹无法删除 这时千万不要用 rm -rf /var/bak/ 来删除 否则你删除的并不是链接文件 而是真正的 /home/user/bak 文件夹
想要删除链接文件要用以下命令
rm /var/bak
只是少了一个“ / ” 删除的 就是链接文件
结论:
在删除文件时要小心
在删除软链接文件时 小心使用 Tab 建
还原被删除的 /tmp 文件夹
我在文章Linux和Unix shell,我犯了一些错误。我意外地删除了/tmp文件夹。要还原它,我需要这么做:
1
2
3
4 mkdir /tmp
chmod 1777 /tmp
chown root:root /tmp
ls -ld /tmp
我如何删除意外在当前文件夹下解压的文件?
我意外在/var/www/html/而不是/home/projects/www/current下解压了一个tarball。它搞乱了/var/www/html下的文件,你甚至不知道哪些是误解压出来的。最简单修复这个问题的方法是:
1
2 cd /var/www/html/
/bin/rm -f "$(tar ztf /path/to/file.tar.gz)"
文章知识点与官方知识档案匹配,可进一步学习相关知识
sudo update-alternatives --config python
update-alternatives: 错误: 无 python 的候选项
dpkg -L python3
/.
/usr
/usr/bin
/usr/lib
/usr/lib/valgrind
/usr/lib/valgrind/python3.supp
/usr/share
/usr/share/doc
/usr/share/doc/python3
/usr/share/doc/python3/README.Debian
/usr/share/doc/python3/changelog.Debian.gz
/usr/share/doc/python3/copyright
/usr/share/doc/python3/python-policy.dbk.gz
/usr/share/doc/python3/python-policy.html
/usr/share/doc/python3/python-policy.html/build_dependencies.html
/usr/share/doc/python3/python-policy.html/embed.html
/usr/share/doc/python3/python-policy.html/index.html
/usr/share/doc/python3/python-policy.html/module_packages.html
/usr/share/doc/python3/python-policy.html/other.html
/usr/share/doc/python3/python-policy.html/packaging_tools.html
/usr/share/doc/python3/python-policy.html/programs.html
/usr/share/doc/python3/python-policy.html/python.html
/usr/share/doc/python3/python-policy.html/python3.html
/usr/share/doc/python3/python-policy.html/upgrade.html
/usr/share/doc/python3/python-policy.txt.gz
/usr/share/doc/python3.7
/usr/share/lintian
/usr/share/lintian/overrides
/usr/share/lintian/overrides/python3
/usr/share/man
/usr/share/man/man1
/usr/share/pixmaps
/usr/share/python3
/usr/share/python3/python.mk
/usr/share/python3/runtime.d
/usr/share/python3/runtime.d/public_modules.rtinstall
/usr/share/python3/runtime.d/public_modules.rtremove
/usr/bin/pdb3
/usr/bin/pydoc3
/usr/bin/pygettext3
/usr/share/doc/python3.7/python-policy.dbk.gz
/usr/share/doc/python3.7/python-policy.html
/usr/share/doc/python3.7/python-policy.txt.gz
/usr/share/man/man1/pdb3.1.gz
/usr/share/man/man1/pydoc3.1.gz
/usr/share/man/man1/pygettext3.1.gz
/usr/share/pixmaps/python3.xpm
dpkg -L python
/.
/usr
/usr/bin
/usr/lib
/usr/lib/valgrind
/usr/share
/usr/share/apps
/usr/share/apps/konsole
/usr/share/apps/konsole/python.desktop
/usr/share/doc
/usr/share/doc/python
/usr/share/doc/python/README.Debian
/usr/share/doc/python/changelog.Debian.gz
/usr/share/doc/python/copyright
/usr/share/lintian
/usr/share/lintian/overrides
/usr/share/lintian/overrides/python
/usr/share/man
/usr/share/man/man1
/usr/share/pixmaps
/usr/bin/pdb
/usr/bin/pydoc
/usr/bin/pygettext
/usr/lib/valgrind/python.supp
/usr/share/man/man1/pdb.1.gz
/usr/share/man/man1/pydoc.1.gz
/usr/share/man/man1/pygettext.1.gz
/usr/share/pixmaps/python.xpm
ln -s python /usr/share/python3
ln: 无法创建符号链接'/usr/share/python3/python': 权限不够
pi@raspberrypi:~ $ sudo ln -s python /usr/share/python3
pi@raspberrypi:~ $ python --version
Python 2.7.16
pi@raspberrypi:~ $ python3 --version
Python 3.7.3
pi@raspberrypi:~ $ sudo ln -s python /usr/bin/python3
ln: 无法创建符号链接'/usr/bin/python3': 文件已存在
实在不顺,再试.
ls /usr/bin/py*
/usr/bin/py3clean     /usr/bin/pygettext2.7      /usr/bin/python2-config
/usr/bin/py3compile   /usr/bin/pygettext3        /usr/bin/python2-pbr
/usr/bin/py3versions  /usr/bin/pygettext3.7      /usr/bin/python3
/usr/bin/pybuild      /usr/bin/pygmentize        /usr/bin/python3.7
/usr/bin/pyclean      /usr/bin/pyjwt             /usr/bin/python3.7-config
/usr/bin/pycompile    /usr/bin/pyjwt3            /usr/bin/python3.7m
/usr/bin/pydoc        /usr/bin/pylint3           /usr/bin/python3.7m-config
/usr/bin/pydoc2       /usr/bin/pypy              /usr/bin/python3-config
/usr/bin/pydoc2.7     /usr/bin/pypyclean         /usr/bin/python3m
/usr/bin/pydoc3       /usr/bin/pypycompile       /usr/bin/python3m-config
/usr/bin/pydoc3.7     /usr/bin/pyreverse3        /usr/bin/python-config
/usr/bin/pyflakes     /usr/bin/python            /usr/bin/pyvenv
/usr/bin/pyflakes3    /usr/bin/python2           /usr/bin/pyvenv-3.7
/usr/bin/pygettext    /usr/bin/python2.7         /usr/bin/pyversions
/usr/bin/pygettext2   /usr/bin/python2.7-config
参照: 0x03 采用update-alternatives 切换版本
详细步骤说明,如何建立选项,如何选择,怎么选择,终于输入 PYTHON 显示的PY3啦
sudo update-alternatives --config python
有 2 个候选项可用于替换 python (提供 /usr/bin/python)。

  选择       路径              优先级  状态
------------------------------------------------------------
  0            /usr/bin/python2.7   2         自动模式
  1            /usr/bin/python2.7   2         手动模式
* 2            /usr/bin/python3.7   1         手动模式

要维持当前值[*]请按<回车键>,或者键入选择的编号:^C
pi@raspberrypi:~ $ python
Python 3.7.3 (default, Jan 22 2021, 20:04:44)
[GCC 8.3.0] on linux
Type "help", "copyright", "credits" or "license" for more information.
>>>
hanlp segment
Traceback (most recent call last):
  File "/home/pi/.local/bin/hanlp", line 6, in <module>
    from pyhanlp.main import main
ModuleNotFoundError: No module named 'pyhanlp'
中莫会是啊 